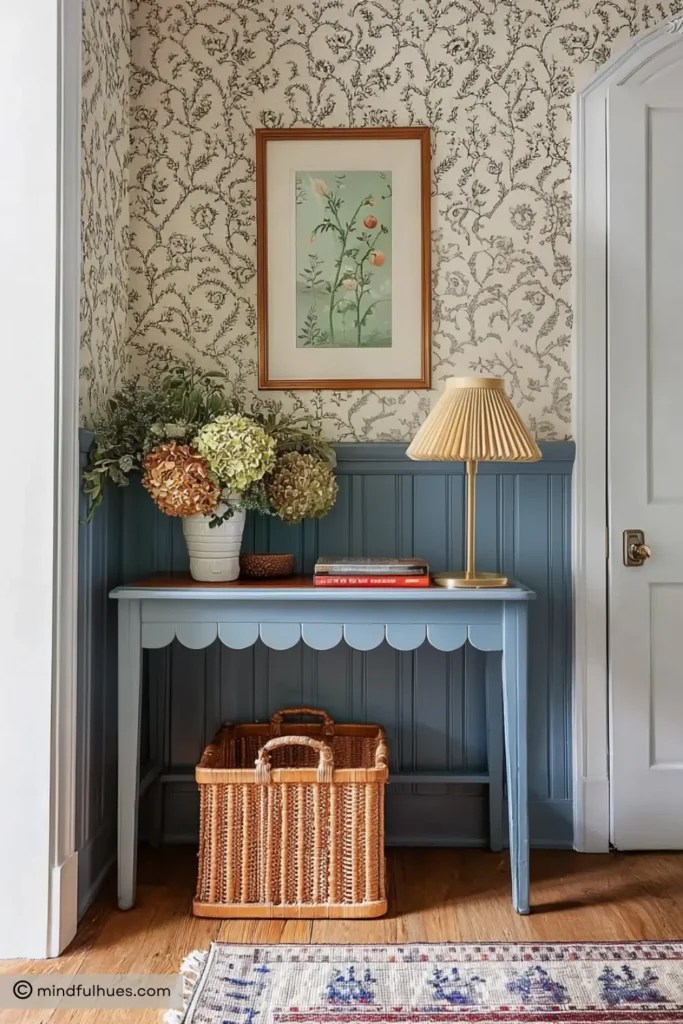
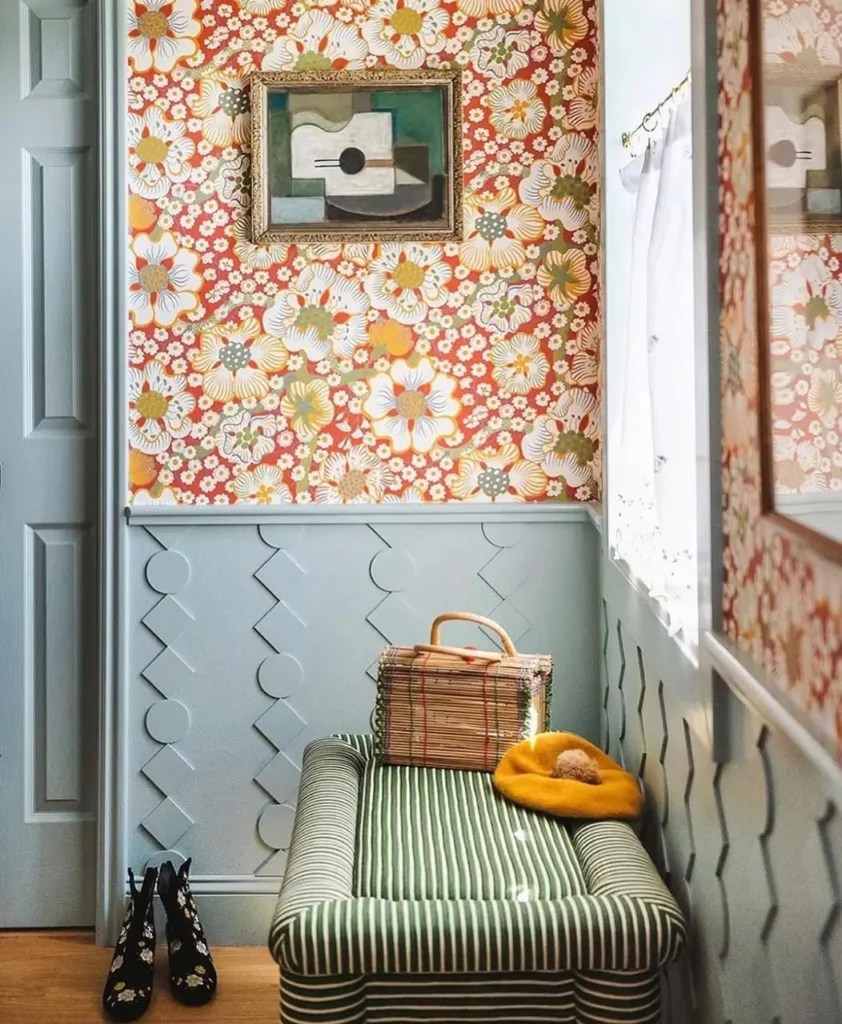
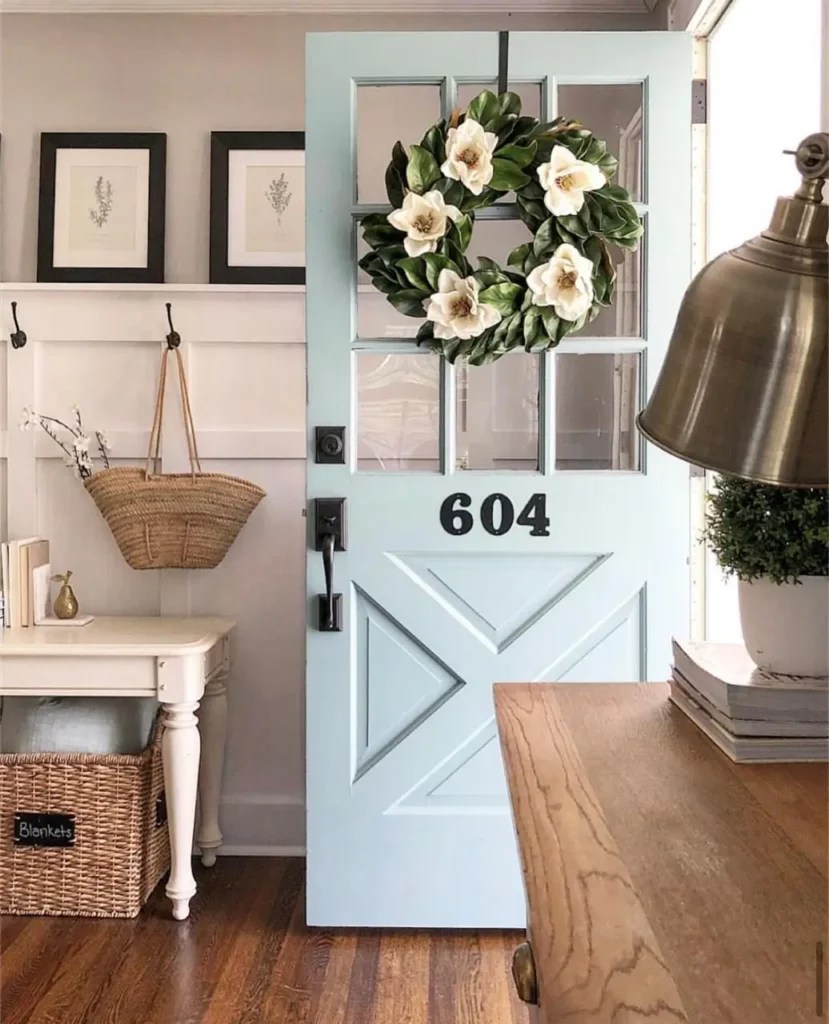
You’ve picked the trim, chosen the paint color, and you’re ready to bring that crisp, classic wainscoting look to your entryway. The Pinterest boards are full, your tools are waiting… but before you lift that brush or buy a single panel: pause.
Because here’s the truth: the height of your wainscoting is what separates a “pretty good DIY” from a design that looks like it came straight out of a magazine.
It’s one of those subtle details that completely changes how a space feels. Too low, and it can look like an afterthought; floating awkwardly on your wall. Too high, and your entryway might suddenly feel closed in or top-heavy. When you get the proportions just right, though, wainscoting adds that perfect sense of balance and flow that makes people stop and look.

If you read my post on bathroom wainscoting, you already know how transformative the right paneling can be – it adds texture, character, and architectural charm to even the smallest spaces. The same principle applies here, but the entryway is a little trickier. It’s often the first impression of your home, a transitional space that needs to feel both welcoming and approachable.
That’s exactly what this wainscoting height guide is here to help you with. So if you’re wondering how high the wainscoting should be in an entryway or perhaps trying to nail down proportions that complement your wall height, trim, and décor style, I’ll walk you through everything step-by-step.
By the end of this post, you’ll feel confident choosing the right height for your wainscoting; one that fits right and feels right.
Why Wainscoting Height Matters More Than You Think
If you’ve ever walked into a room and thought, Something feels off, but I can’t quite put my finger on it, chances are, it had to do with proportion. And when it comes to wainscoting, proportion is everything.
Wainscoting isn’t just decorative trim; it’s a design tool that brings structure and rhythm to your walls. The right height creates balance and harmony, helping your entryway feel grounded and thoughtfully designed. The wrong height, though? It can make even the most beautiful molding or paint color feel out of place.
Think of your walls as a composition.
- When wainscoting sits too low, it can look disconnected or unfinished — like the room is “cut off” before it really begins.
- Go too high, and it can overwhelm the space, especially in smaller or lower-ceiling entryways, making them feel heavy or boxed in.
The key is finding that sweet spot: the point where your eye naturally rests and your space feels “just right.” This is what professional designers pay close attention to, and why the height of your wainscoting matters so much more than most people realize.

🏡: thehousethatlarsbuilt Design: metacoleman
In traditional architecture, these proportions were guided by classical design principles; the same ones used in historic millwork and grand foyers. But the beauty of modern wainscoting design is that you can adapt those timeless rules to fit your own home’s scale and style.
Your entryway, in particular, sets the tone for everything that follows. It’s the space that greets you (and your guests) every day; so the way it’s designed should feel fluid and welcoming from the moment you step through the door.

Pay attention to your wainscoting proportions, and you’ll not only enhance the look of your walls but also change how your entryway feels; taller, cozier, more elegant, or more open, depending on what you’re going for.
In the next section, we’ll get practical; breaking down the golden rules of wainscoting height so you can confidently choose the right scale for your walls, ceiling height, and overall home design.
The Golden Rules of Wainscoting Height
Now that you understand why height matters, let’s talk about how to get it right. If you’re planning classic board and batten or sleek modern paneling, the right wainscoting height depends on a mix of math, style, and intuition.
The good news? There are tried-and-true guidelines that designers (and homeowners who’ve done this before you!) swear by. Think of these as your wainscoting height cheat codes; flexible enough to adapt to your space, but grounded in timeless design principles.
The ⅓ Rule — Classic and Timeless
If you’re ever unsure how high wainscoting should be, start here. The “one-third rule” is a design classic ; and for good reason.

For standard 8-foot walls, this means your wainscoting height should land around 32 inches from the floor. That sweet spot creates visual balance, keeping your eye comfortably centered on the wall while leaving plenty of breathing room above for artwork, mirrors, or a statement paint color.
This proportion works beautifully for most entryways, especially if you love that crisp, traditional look.
Half Wall Height — Elegant and Traditional
If you want your entryway wainscoting to make more of a statement, consider taking it halfway up the wall. A ½-height installation feels slightly more formal and pairs beautifully with traditional molding or a two-tone paint palette.
This style can help elongate a smaller entryway; especially if you use a lighter color on top and a slightly deeper tone or texture below.

Image: littlegreenepaintcompany
Two-Thirds Height — Bold and Dramatic
For homes with taller ceilings or narrow hallways, wainscoting that climbs higher up the wall (around ⅔ of the total height) adds drama and draws the eye upward.
This is a great choice if you’re going for a modern, vertical design or want to highlight the height of your space. It gives an architectural feel; even if your home didn’t start with one.

Design: kathykuohome
Full-Height Paneling — Grand and Modern
And then there’s the boldest option of all: full-height wainscoting. This creates an enveloping, custom-built look that works beautifully in minimalist, modern, or transitional spaces.
It can completely transform your entryway, especially when paired with monochrome paint colors or rich, textural finishes. Think of it as your “instant architecture” upgrade.
My tip: These numbers are your starting point; not strict rules. Always tape out your chosen height with painter’s tape before committing. Seeing it on your wall in real lighting and context helps you spot what feels “just right” for your space.

🏡: @keltaracottage Styling: carleneduffy 📷: mindicooke for homebeautiful
In the next section, we’ll look at how to match wainscoting height to your entryway’s layout and style, so your design feels perfectly proportioned and cohesive from every angle.
Matching Height to Your Entryway’s Style and Layout
By now, you know the “golden rules”; but here’s the fun part: you get to bend them to fit your home. Every entryway has its own personality — tall, narrow, bright, cozy — and the best wainscoting height is the one that complements those unique proportions.

So before you cut a single board or start painting, take a minute to look around your space. Where does your eye naturally rest? How high are your door frames, windows, and light switches? Those details will help guide you toward a height that feels balanced and just right.
Here’s how to tailor your entryway wainscoting for different layouts and design styles:
Small Entryway: Go Slightly Taller for a Lifted Look
In a compact space, slightly taller wainscoting (around half wall height) can actually make the room feel bigger. The extra height draws the eye upward and gives the illusion of more vertical space; especially if you use a lighter color above and a richer, grounding tone below.
My tip: Keep your panel pattern simple (like clean vertical battens or shaker-style panels) to avoid overwhelming a small entry.

Design: eminentinteriordesign
Narrow Hall Entry: Keep It Lower to Open the Space
If your entryway is more of a hallway or corridor, stick to the classic ⅓ wall height. Lower wainscoting keeps the proportions light and airy, preventing the walls from feeling like they’re closing in.
Pair this with a crisp white trim and a soft, mid-tone paint color on the upper wall to create an inviting, balanced flow.

High Ceilings or Open Foyer: Scale Up for Proportion
In a two-story or high-ceiling foyer, taller wainscoting (⅔ height or even full paneling) helps anchor the space visually. Without it, walls can feel a bit too vast or “empty.”
This style works beautifully if your home leans modern or transitional – it gives your entryway a grand, architectural feel without being fussy.
Open-Concept Entryway: Align with Adjoining Spaces
If your entryway opens into other rooms or a staircase, use those sightlines to guide your wainscoting height. Aligning the top of your panels with adjoining trim, stair rails, or wall breaks can help create visual flow and a seamless transition from space to space.

You can even echo the same wainscoting height from your bathroom wainscoting (if it’s nearby or visible) for a cohesive, designer-approved look that ties your whole home together.
Quick Visual Test
Before you commit, grab some painter’s tape and mark out a few different heights on your wall — ⅓, ½, and ⅔. Step back, snap a few photos, and see which feels most natural from multiple angles. Often, your eye will tell you what’s right faster than a measuring tape can.
In the next section, we’ll look at how paint, trim, and finish choices work hand-in-hand with your wainscoting height to shape the mood and overall style of your entryway: from light and airy to bold and dramatic.
Paint, Trim, and Finish — How Height Changes the Look
Once you’ve figured out the right wainscoting height, the next step is making it look charming. This is where your paint, trim, and finish choices come in; the details that can completely transform how your entryway feels.
Think of wainscoting as more than just paneling; it’s a backdrop for your home’s personality. Depending on how high it goes and what colors or finishes you choose, you can make your space feel lighter, cozier, taller, or even more dramatic.

Here’s how to make your entryway wainscoting work beautifully with your paint and trim:
Shorter Wainscoting: Perfect for Contrast and Balance
If you’ve chosen a lower wainscoting height (around ⅓ of the wall), lean into contrast. A darker paint or stain on the wainscoting with a lighter color above creates a crisp, designer look that highlights your trim work and keeps the space fresh and open.
This combo works especially well in smaller entryways, where you want to add character without making the walls feel heavy.

🏡: Susan Crater styling: mieketenhave 📷: maxkimbee for fredericmagazine
My tip: Try pairing white paneling with a soft greige or muted sage on top; timeless, welcoming, and endlessly adaptable.
Taller Wainscoting: Cozy, Cocooning, and Sophisticated
If your wainscoting height is closer to half or two-thirds of the wall, you can use color to create a cozy, enveloping effect. Go bold with dark and moody paint colors for entryways – deeper tones like navy, charcoal, or olive green can add warmth and make your entryway feel fluid and elegant.
This look pairs beautifully with brass or matte black hardware, natural wood accents, and layered textures like woven baskets or framed art. And if you’ve got a tall or open foyer, darker wainscoting can actually help ground everything so the space feels balanced instead of echoey or a little too open.
But honestly, light and airy colors work just as beautifully though differently. Soft neutrals, pale pastels, and gentle earth tones can brighten things up and make it feel light and airy. There are tons of gorgeous examples of lighter wainscoting that still look elevated; it’s really about how you style the rest of the space. A bit of warm lighting, some texture, maybe a natural wood bench… it all keeps lighter palettes from feeling too flat.

Design: studiodaydesign 📷: taylorhallobrien
At the end of the day, it’s about what you love and what feels right in your home. There’s no one “correct” way to do color. If it makes you happy when you walk through the door, that’s the version that works.
Full-Height Paneling: Modern, Seamless, and Architectural
Full-height or floor-to-ceiling wainscoting blurs the line between wall and trim — creating a sleek, architectural look that’s especially striking in modern or minimalist homes.
For this style, keep your color palette cohesive. A single tone across the walls, trim, and paneling (think creamy whites, warm taupes, or rich moody hues) creates a high-end, monochrome finish that feels calm and intentional.

Design: katie leclercq 📷: aaronleitz
If you want texture without color contrast, consider painting your entryway wainscoting and walls in the same hue but different sheens; for example, eggshell on the walls and satin on the trim for subtle visual depth.
Lighting and Finish Do Matter
Your lighting and finish can change how your wainscoting reads. A glossy finish reflects light beautifully in darker hallways, while a matte or satin finish gives a more relaxed, contemporary feel.
And don’t forget natural light; if your entryway is on the darker side, lighter wainscoting at a lower height can help open things up visually and keep the space from feeling cramped.

In the next section, we’ll go over the most common wainscoting mistakes to avoid; because even a perfectly measured height can fall flat if a few small details are overlooked.
Common Mistakes to Avoid
So, you’ve measured, taped out, and chosen your favorite wainscoting height; but before you grab your nail gun, let’s talk about the common mistakes that can throw off even the most carefully planned entryway wainscoting project.
These are the small details that make the difference between “almost right” and “absolutely stunning.” The good part? They’re all easy to avoid once you know what to look for.
Mistake #1: Ignoring Furniture and Fixture Heights
Your wainscoting proportions should work with your furniture, not fight against it.
If your entryway includes a console table, bench, or coat hooks, make sure your wainscoting doesn’t cut awkwardly through them. Ideally, it should either sit just below or align cleanly with the top of your furniture for a cohesive, put together look.
My tip: Tape out both the wainscoting and your furniture placement before installing — it’s amazing how different things can feel once you see them together on the wall.
Mistake #2: Overlooking Light Switches and Outlets
Nothing ruins beautiful entryway wainscoting faster than a light switch cutting straight through a panel.
Before you finalize your height, check where your outlets and switches fall. Adjust slightly up or down if needed so that trim lines don’t intersect awkwardly with them. A small shift can make your whole wall look more elegant.
Mistake #3: Forgetting Ceiling Height and Door Trim Alignment
If your home has varying ceiling heights or tall door frames, those architectural lines should guide your wainscoting height. Keeping the top of your panels aligned with nearby trim or visual breaks creates flow and makes your design feel cohesive throughout your home.
When your wainscoting ends mid-trim or just below a window sill, it can look visually “off.” Always double-check your sightlines before you install.

Mistake #4: Choosing the Wrong Color Contrast
Contrast can be beautiful – but too much of it can throw off your wall proportions. If your wainscoting height is lower (around ⅓ of the wall), a darker color on the bottom usually works best. For taller paneling, a mid-tone or monochrome palette keeps things balanced.
If your paint contrast emphasizes the wrong height, it can make your entryway look shorter or narrower than it really is.
Mistake #5: Skipping the Visual Test
This is the one I always emphasize in my wainscoting design tips: Never install without testing first.
Use painter’s tape to mark your intended height — or even better, tape out a few different versions (⅓, ½, and ⅔). Step back, take photos from different angles, and see which one looks most natural to your eye.
Your space, lighting, and wall proportions are unique; and sometimes the most “technically correct” height isn’t the one that feels best.
My tip: If you’re unsure between two heights, always go with the slightly lower option. Wainscoting tends to visually “grow” once it’s painted and trimmed out.

Image Credit: mandarinstone
Design Confidence Starts with Proportion
If there’s one thing to take away from this wainscoting height guide, it’s that great design doesn’t start with color; it starts with proportion.
Getting your entryway wainscoting height right is what makes everything else fall beautifully into place. It’s the detail that gives your walls structure, your trim purpose, and your entire home that polished, “designer-approved” look; even if you did it all yourself.
And you don’t need to be an interior designer to pull it off. With a few simple guidelines, a roll of painter’s tape, and a good eye for balance, you can create a space that feels elevated from the moment you walk through the door.
Even small adjustments in height can completely change the feel of your entryway — making it cozier, taller, or more open. Once you start noticing those wainscoting proportions, you’ll begin to see them everywhere: in magazines, model homes, and those perfectly styled Pinterest photos. And you’ll know why they look so good.
So take your time, test your ideas, and trust your instincts. You’ve got this.
P.S. If entryways are on your mind, don’t stop here! Sprinkle in some sunshine with yellow entryways, bring the good vibes with feng shui entryways, or welcome the season with a spring entryway refresh – and your home’s first impression just got a major upgrade.
Leave a Reply